Showing posts with label hornby. Show all posts

Sunday, 10 December 2017

How to Clean Your Layout: Track Cleaning Alternatives from Hornby, Dapol and Gaugemaster

Keeping a layout clean (at least the important bit - the tracks) is a bugbear for many active model rail enthusiasts. For those of us that either have our layouts in dusty environments (attic and garage) or travel with them, dirt and grime is a constant worry.

|When it builds up on the tracks, it can prevent proper electrical connection.

Although it is less noticeable for high speed trains that run around in a big loop, many of us are also downsizing to smaller layouts due to lack of space. This leads to lower speed shunting layouts with Class 08s crawling at low speeds and over pointwork which can be very susceptible to dirt.

Track Cleaning Alternatives

Here's a brief overview of (almost) all the options, plus links to examples:

  • Hornby track cleaning coach - small yellow coach, a bit garish but functional, with old-style D couplings;
  • Gaugemaster track cleaning pads - pads that hang below the axle of any coach/truck, but do not scrape or press down at all, so only really good when used in conjunction with a high frequency electronic track cleaner (see below);
  • Dapol track cleaner - motorised track cleaning locomotive: expensive but effective, pair up with Dapol rack cleaning fluid;
  • Track rubber - simple, effective, and quite time consuming (also, you need to be able to reach all corners of the layout);
  • Electronic track cleaner (Gaugemaster) - always-on, detects instants when connectivity is broken, and uses a high frequency current to burn off any dirt before it can build up;
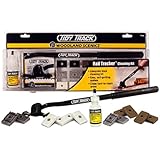
  • Track cleaning kit (Woodland Scenics, pictured) - contains everything needed to thoroughly clean your track, including a telescopic arm on which you can mount the cleaning pad to reach the most distant corners of your layout. 
Essentially, there are three different approaches to cleaning track, one of which (the electronic cleaner) is more about prevention than cure.

Of the other two, there is a difference between the more abrasive approach of the Dapol, Hornby and track rubber solutions which rely on scraping to remove dirt, and the pad approach, which is gentler.

Cleaning solutions that use scraping need two things -- downwards pressure on the track, and movement, usually powered.

The Hornby cleaning coach needs to be pushed around by a locomotive (and comes in at around £30), whereas the Dapol track cleaning unit is self-powered, but also over twice the price (expect to pay around £70).

Everything else requires good, old-fashioned, elbow grease.

Tips for Better Results when Cleaning Track


There are a number of reasons why keeping track clean is a good idea. Besides the obvious -- dropping power and stopping -- any dirt that is present on the tracks will be picked up by locos and can get deposited on the pickups causing a longer-term issue.

So, the first key to keeping tracks clean might appear counter intuitive -- keep the loco wheels clean!

It is also important to avoid over-oiling the tracks as this will affect running and pulling power, is it may cause the wheels to slip. However, light oiling can help protect the tracks and prevent dirt build-up, so some model rail enthusiasts swear by it, usually using a citrus based product.

Finally, for the best wipe-off cleaning results, an alcohol based fluid or cleansing wipe, or good old lighter fluid (but be warned, it's highly flammable!) is a good option.

However, as I point out in my Hornby Track Cleaning Coach article, a dedicated track cleaning truck, or coach, cannot be beaten.

Friday, 8 December 2017

Model Rail Christmas Gifts: Hornby Track Cleaning Coach

The Hornby Track Cleaning Coach (R296) popped up on Hornby's annual Top 10 Model Rail Christmas Gift list. It rolled (pun intended) into 10th place, but to my mind should have been higher.

Reading the reviews, there are a few negatives to go with the largely positive opinion of this tidy inexpensive solution to the perennial problem of dirty tracks.

This analysis of the R296 is based on a mixture of these reviews and personal experience. My own layouts are in a loft space and the garage -- both pretty dusty and prone to picking up dirt -- as well as the seasonal Christmas train around the tree in the sitting room.

This last is perhaps the worst, but due to fluff and not dirt: the tracks are pretty clean!

How Does the Hornby Track Cleaning Coach Work?


The point of a track cleaning coach is that it has to be abrasive to work. It scrapes the dirt off the tracks; replacing the need to go round with a track rubber.

A track rubber is an excellent low-cost solution if you can reach all the corners of your layout. In the garage layout, which is on wheels, I can. In the loft, where the layout is built into a corner, that's not the case.

Enter the track cleaning coach: two strips of wet and dry paper, held in spring-loaded clamps that force themselves onto the rails, pushed around by a suitable locomotive.

Most layouts that aren't actually grimy can be cleaned with a single trip around the loop. Obviously, dirtier tracks will need more attention, and for some only adding some form of cleaning fluid will have the desired effect.

So, for a lightly dirty track, this is the perfect solution. Points (a.k.a. turnouts or switches) don't unsettle it, but use with care, and consider cleaning them separately. They shouldn't usually be in inaccessible places on the layout anyway, for several reasons:
  • if they're powered, they can go wrong;
  • if they're manual, you need to switch them;
  • if they're wire-in-tube, then they can suffer mechanical faults.
One point that most reviewers agree on is that you should also buy replacement strips at the same time because you don't get many in the box, and they will wear out.

Alternatives to the Hornby Track Cleaning Coach

I'm going to do a feature on this before Christmas, but 

For ease of use, realistic price, and as a great Christmas gift for any model rail enthusiast, I'd go for the Hornby R296 Track Cleaning Coach.

Tuesday, 17 September 2013

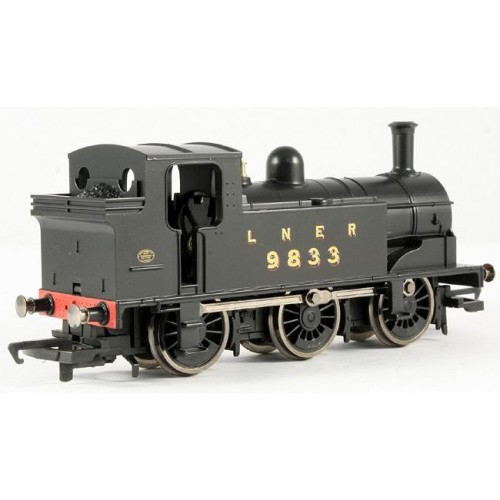
Review of the Hornby R3120X LNER J83 00 Gauge DCC Fitted Steam Locomotive

The R3120X is a Railroad model. It bears stating up front, just so you realise that the price tag will probably reflect the build quality. Usually, Railroad also means D-ring couplings moulded onto a Lima style chassis.

In this case, I was mislead slightly by the Amazon description, which indicates that it has NEM pockets. If this is the case, then they've hidden them well.

I'd err on the side of caution and say that, from the picture below, these are moulded Lima style D-ring couplers, rather than NEM couplings as listed. (If anyone knows differently, please let me know in the comments section!)
(Thanks to Papamallard for the picture)

Still, it is a handsome J83, at a reasonable price.If you can get it for the 40 - 50 GBP range, including delivery, that is. So, what makes it such a good deal?

For a start, it has DCC fitted. This is a little odd, since as a Railroad model, with D-ring couplings, it is going to most likely find itself on an analogue layout (I would think) rather than a DCC one. And, curiously, that's it's value - it's a great price for a DCC fitted model.

So, where does it fit in on your layout?

Briefly, the J83's were made at the turn of the last century, and lived on through the grouping changes into BR ownership proper. The last J83 was removed from service in the early 1960s.

They were generally used for shunting and short haul of goods. In fact, they were used for mineral trip workings and goods transfer up until 1909. Hornby also sell, in their Railroad range, a pack of three 12T mineral wagons, which would be a good place to start, if creating a layout around this loco.

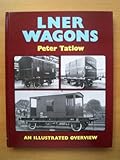
There's also a book by Peter Tatlow, which I've not been able to find new, but which is available second hand, and which covers all the various wagon types that might have been seen behind the J83.

Bachmann do some interesting wagons, such as fish vans, in LNER livery, in the correct era, which would have made sense in and around the Scottish coast. Fitting them would require a change in coupling, of course.

Bachmann also do a 45 ton Bogie Well Wagon, in LNER livery, with a boiler, which could feasibly have been seen being shunted around by a J83 at this time.

Another option is to look at the shed history, post 1930, of these locos. Into the 1930s, they were allocated to sheds (for shunting duties) from which they would, generally, retire.

LNER 9833 was allocated to shed 65A, Eastfield, near Glasgow. Eastfield itself has had a turbulent history, having been destroyed by fire in 1919, used to service up to 200 steam locos after the rebuild, was subsequently closed in 1966, only to re-open in 2004 as a TMD.

If we place 9833 at  Eastfield following the fire and rebuild, then a few options come to mind, including shunting around locos that have come in for repair, or for shunting things like the aforementioned LNER bogie plus boiler.

Hopefully that sparks a few likely scenarios, and provides food for thought for what is a well priced, small loco with an interesting history.

(Thanks to LNER.info, and RailUK, among others, for the information.)

Tuesday, 3 September 2013

Building a Layout Around the Southern Railway 2-BIL EMU

Hornby 2-BIL EMU
Hornby have now released their R3161A Southern Railway 2-BIL EMU twin pack, and it's such a handsome model that I thought I might like to try and incorporate it into a shelf layout that I'm thinking of building.

It turns out that it might not be 100% appropriate (and also that my skills aren't quite good enough yet to do it justice) but I thought I'd share my research with you.

So, from the top - the 2-BIL units were built from 1935 to 1938, and were DC third rail EMUs. They lasted into the 1970s, under the TOPS Class 401 allocation. If you ever wanted to see one in the flesh, the only preserved example is in the National Railway Museum, in York, according to the Southern Electric website.

Looking at photos, it looks as if the Metcalfe Signal Box would work nicely alongside the Class 401 (I'm using the TOPS classification because my layout would be based in 1970 or thereabouts), but I remain undecided on what kind of station would be best.


To further research this, before buying any extra buildings, I'd need to consult something like Modelling the Southern, an excellent book by Jeremy English. It's subtitled 'Ideas and Inspiration' and would help to avoid any serious faux pas.

My initial idea was to have the passenger component running on an auto-shuttle, something like the Gaugemaster SS-1, and then have a DCC based interactive shunting part based around some kind of goods yard or scrap metal merchant.

Since I'm pretty much a diesel fan, that leaves only the Class 12 of the three diesels that were built by the Southern Railway company. The other two were retired and cut up before the 1970 cut-off date that I'm envisaging.

However, I can't seem to find anyone who makes the Class 12; the closest I can get is the Class 08, which would have to be re-engineered a little to become a Class 12, if indeed it's possible. This is one of the reasons I've decided not to go the SR route at this time.

Examples of other Southern Railway rolling stock are available, all of which could be used to give the layout an authentic feel. They're just not really my bag!

As for layout ideas, I was also wondering if something like this Mile by Mile book might have been a good source of inspiration, had I decided to stay with the topic.

I'm a fan of research, and this book, covering the railway in 1947 would have been a good source of historical information pertaining to the use of the railway, and its original raison d'etre.

Another good book for helping research is the Southern Railway Handbook, which I still plan on purchasing as it will no doubt come in handy in the future since it covers the whole period from 1923 to 1947, complete with pictures.

What I'm really hoping for with this book is a good background in the steam/diesel transition years, which is a period that I hope to model into an exhibition quality shelf layout, once I've honed my skills on my current projects.

For more information about either of these titles, just click the images.

Other ideas for a Southern Railway layout might include coastal operations, such as various imported goods that would come into the UK by way of the various ports.

The nature of these goods will depend on the era. Perhaps a more easily accessible prototypical freight operation would include cattle and milk. A good initial source of information for Southern Railway modellers is the Wikipedia article on the topic.

Have fun!

Wednesday, 28 August 2013

What Coupling System Do Hornby Currently Use?

This is a question that has come up a few times now, and there is a really quick answer : they use two, Lima-style D-ring couplings that are moulded onto the rolling stock (loco, wagon, carriage, etc.) and NEM pocket couplings with reasonably standard tension lock couplings inserted.

The Hornby Railroad (cheaper) range have the D-ring couplings, and the Hornby non-Railroad ranges have the NEM couplings. If in doubt, simply use the product code to search the Hornby shop. If the product has NEM couplings, it will say so under 'Special Features'.

However, there are a few points that I suspect lurk behind the original question. The first related to compatibility.

The old Lima style D-rings are moulded onto the rolling stock, so that they are part of the chassis. This means that changing them to NEM couplings, whilst doable, is a messy process.

You'd be better off buying the more expensive, and slightly more attractive (neither are actually prototypical) models with NEM couplings if that's your goal. Of course, there's a caveat.

That caveat is that Hornby actually sell packs of NEM compatible D-ring couplings. These enable you to buy up Railroad (cheaper) wagons and carriages and then couple them to Hornby non-Railroad locomotives, by taking out the tension lock couplings and replacing them with the D-ring ones.

That's part of the beauty of NEM couplings - you can change the actual couplings for others. This becomes necessary, even if you've splashed out on non-Railroad stock, if you use Brian Kirby style magnetic uncoupling.

The reason is that the Hornby tension lock couplings are made of ferrous material, unlike the Bachmann ones (for example) which are not. If you have ferrous tension lock couplings, then the Brian Kirby approach doesn't work, as the magnets affect the coupling directly.

But that's the beauty of the NEM couplings - if you really don't like them, you can always swap them for some Kadee knuckle couplings, which are generally thought of as being more prototypical, and provide excellent delayed action magnetic uncoupling/coupling which is very versatile.

So, that's pretty much everything I now about the current coupling system that Hornby uses in both the high-end and Railroad product ranges.

Thursday, 8 August 2013

Should I Convert Bachmann Coupling to Hornby (or vice versa?)

Many of us have both Bachmann and Hornby rolling stock. For my part, I prefer the Bachmann locos over the Hornby ones, but sometimes needs must and they are just too pricey. I also have a penchant for out of stock (and even out of manufacture) wagons from the Railfreight Red Stripe era, which are not always easy to come by.

Subsequently, I have a mix of Bachmann and Hornby, and have struggled with the approach needed to convert Bachmann coupling to Hornby, or the other way around.

In fact, the answer is not obvious, but very simple : neither - it's not about the couplings, it's about the way that they are attached to the rolling stock. There are so many different types of coupling to choose from - and neither the pre-fitted RTR couplings from Hornby or Bachmann are the best - that it's usually simpler to choose one, and then convert everything to NEM.

The Buffers Model Railways Couplings Guide, a great round up of all the couplings on the market, points out that when mixing Hornby and Bachmann, they're often not even set at the same height. Thus, adapting all rolling stock to use NEM pockets is a logical first step.

The article Converting Rapido to NEM Couplings from a few weeks back covers this in detail (and is applicable to old style Hornby and Bachmann as well as Rapido), but you may well find that your modern rolling stock has been pre-fitted with NEM pockets.

This being the case, you can just choose the best coupling for your needs, and buy in bulk. Or, if you already have Hornby, with the standard Lima D ring style coupling, and one of those Hornby uncouplers (Uncoupling Ramp reference R620), you can just buy NEM compatible D couplings and switch them out.

This technique will also work if you have modern Bachmann stock, but only if the heights of the rolling stock are the same, which isn't always guaranteed! It is, however, somethign I've done in the past, but now I'm steadily converting all my rolling stock to the Bachmann tension locks, in order to use Brian Kirby style magnetic uncoupling.

Friday, 12 October 2012

Getting Started in Model Rail : High Street Brands

Everyone has to start somewhere in the model rail hobby, and one of the best ways is to buy some ready to run, off the shelf kit from one of the main high street brands.

There are many, many manufacturers of model rail equipment, locomotives and rolling stock, and they range from fairly specialist makes to two or three brands generally available on any high street, or via the web.

So, gauge by gauge, here is a guide to some of the most popular readily available brands for those just getting started with model rail.

OO - Hornby Railroad

Hornby International is one of the oldest established brands, with sub brands including Hornby, Hornby Railroad, and Lima.

Railroad is a hobby oriented brand, offering slightly cheaper, less detailed and lower specification locomotives and rolling stock. 

Since the acquisition of Scalextric, some of the Railroad locomotives allegedly come with a Scalextric motor, leading them to be less smooth to operate, and with unrealistic acceleration and top speeds.

Despite this, it's a good starting point for a model rail enthusiast; but be aware that the couplers are not generally compatible with other brands such as Bachmann and more expensive Hornby models.

Railroad boxes are easy to spot, as they have yellow flashing on the bottom, below the window.

OO - Hornby

Within the Hornby range, there are also various levels of finishing and price. While any model from this range will be of good quality, some are better value than others.

Where Hornby does stand out is with the excellent selection of starter packs, which are available from many toy shops. Often these are laid out next to makes like Mehano, and Lima, which can make Hornby (and Bachmann) seem a bit expensive, but the additional investment is well worth it.

OO/HO - Bachmann

Like Hornby, Bachmann has a number of sub-brands in the group, some of which produce European outline stock in HO, US also in HO, and British outline in OO.

Personally, from the various models I have purchased, Bachmann locomotives seem to be better finished, and smoother than the Hornby equivalents, but that some of the Hornby rolling stock (brake vans, for example) offer better value.

Bachmann rolling stock also all comes with standard NEM pockets, making it easy to extend the collection with more rolling stock. It is organized by era to make it easier to cross-match rolling stock without needing to overload on research!

HO - Piko

For European outline stock, Piko is probably the most accessible, and is available in Expert and Hobby, mainly French and German stock, organized by era and region. This makes it easy to match up stock and keep a consistent rake together.

Piko also make good value packs of both freight and passenger trains, complete with track, controllers, and layout ideas.

Piko Hobby boxes can be spotted by the red flashing with Hobby written on them. Piko Expert boxes have blue flashing with Expert written on.

N - Graham Farish

While the smaller gauges (N and Z) are less popular, they require less space, and are gaining in popularity.

Graham Farish, a Bachmann sub brand, provide excellent quality models, at very reasonable prices.

Z - Marklin

Marklin is a bit of an odd-ball, having chosen to implement a 3 rail power system for its locomotives, rendering it incompatible with all the others mentioned here.

For all that, in Z gauge, it does have some interesting starter packs, and is a very space-conscious way to get into model rail as a hobby.

Finally, a few notes about track. Peco is perhaps the largest manufacturer of track, but Hornby also manufactures its own. Generally, it is not possible to mix track between manufacturers, so if a Hornby pack is bought, future expansions will also need Hornby track.

However, HO and OO will both run on the same set-track (i.e. pre-cut, slot together pieces) regardless of manufacturer.

Power is supplied to the track via a special adapter, as either DC or AC. 16v AC is used for so-called DCC (digital command control) trains, while DC is used for analogue sets.

If in doubt - start with a DC (i.e. analogue) solution, as DCC can always be added at a later date. It's far harder to start with DCC as it comes with a whole slew of options, settings, and possibilities that baffle even experienced model rail enthusiasts!

Wednesday, 29 February 2012

How Do I Convert Old Hornby Couplings to New Type

One question that comes up frequently in relation to Hornby trains is "how do I convert from 'old' Hornby couplings to 'new' types of coupling?"

To answer this question, it's important to cover a number of topics, and I've written at least two articles (linked to at the end of this post) relating to my own experiences.

So, let's round up the main points, and hopefully answer the question in hand!

Identifying Hornby Couplings

In my experience, there are several kinds of Hornby coupling. The first (and as appears on the 'Railroad' range) is known as the D-ring, or Lima D-Ring, coupling. It's a moulded coupling, and part of the chassis of the loco or wagon, shaped like a big D.

It's also commonly found on the Hornby Thomas the Tank range.

At the other end of the spectrum are the tension lock couplings which fit into little pockets on the bogies.

There may be other kinds in between - I don't have enough experience with Hornby locos or rolling stock to be sure!

In any case, they'll either be moulded to the chassis, or fitted to rotating pockets on the chassis, or possibly on the bogie itself. The rotating pockets conform to the NEM standard.

Adding New Couplings (NEM)

NEM couplings are the new standard - they're a standard height above the rail, and provide an easy way to change between regular tension lock couplings and specific types like Kadee automatic (un)couplings.

They have a little spring clip that keeps them in place, but which can be slipped out by pushing the ends together with a pair of pliers.

Here's a selection NEM couplings from Amazon that are available for fitting to any piece of rolling stock:


However, these are only useful if your loco, wagon, or carriage, has a NEM pocket. If not, then you'll need to fit one yourself. For HO/OO modelers with a bit of skill Amazon used to have a NEM adapter that will take any of the HO/OO couplings above, but is now seemingly only available from the Amazon.de site.

Feel free to try them both:


Aftermarket NEM Solutions

Here are a few example Symoba couplings from DCC Supplies. They consist of a plate and vertical bar, onto which the pocket itself can be pushed. Usually, the kit will come with a gauge to get the correct height - it's a standard after, all - and will need to be glued in place on the chassis.

The vertical bar will then rotate from side to side, allowing the pockets on the loco and wagon/carriage to remain aligned on turns.

In certain circumstances, the operation may require a change of bogie. It's important to get the right one for the class of loco, or other rolling stock. Here is a selection from the New Modellers Shop - they're all Hornby in this case, but digging around the site ought to throw up other makes, too.

As promised, here are the direct links to my own experiences, adding a Symoba NEM pocket to a Hornby Railroad shunter, and then returning it to D-ring goodness, using the NEM pocket to change from Kadee to a Hornby NEM-compatible D-ring coupling.
For those who really want to get their hands dirty,Fine Tuning and Maintaining 00 Gauge Models contains a lot of great advice for a variety of different modification tasks. 

(Disclaimer : The links to products above go to affiliate pages, where, if you buy something, I make a modest amount to put towards funding this great hobby!)

Thursday, 10 November 2011

Hornby NEM Pocket Couplers

Here's an interesting one. Regular readers will be aware that I have, in the past, converted old Hornby Railroad stock to NEM couplers, but it appears that some people want to go the other way and use the old Lima D-ring couplers in NEM pockets.

Before I show you how, let's just go over the basics. Pre-NEM, manufacturers simply chose a coupling type (Lima-D ring, Bachmann style tension lock couplers, Hornby tension lock couplers, etc.) and variously moulded or screwed it into the design.

Changing the coupling for a specific piece of kit would then be a case of unscrewing (or cutting off, in the case of the Railroad stock) and then attaching the new couplers instead.

With NEM pockets, things have changed.

A NEM pocket, without going into too much detail, allows us to swap between NEM-compliant couplers, and be pretty sure that they'll work. They just clip into (and out of) the pocket.

This was great for new stock, and for converting stock to use (for example) Kadee magnetic auto-couplers, and gave everyone a great deal of easy choice, but the question remained - what to do with the old stock?

Symoba came to the rescue with a number of solutions - the first is a simple arrangement to fit a NEM pocket to a non-NEM model, be it loco or rolling stock. That's the solution I used to fit Kadee automatic couplers to an old Railroad shunter.

However, in doing so, I cut off the existing D-ring, which has left me with an issue : rolling stock with D-ring couplers that I'd like to shunt, but no 'compatible' shunter!

Which brings me on a round trip to Hornby part number R8268, "Pack of 10 large width couplers". (If you want to see one, try the Hornby Spares Page at NewModellersShop - just scroll down a bit!)

These have *gasp* NEM connectors, and will plug into my newly-installed NEM couplers. 

This means two things. Firstly, I'm flexible, and despite the fact that the shunter in question is a bit of a dog (owing to the cheap motor, no doubt), I've finally found a use for it towing slowly away from the shunting yard.

Secondly, just because something looks like a good idea, doesn't always mean it is. I should have left those D-rings on in the first place, since the shunter (despite a DCC conversion) has turned out to be useless at ... shunting!

Addendum : Amazon also stock the NEM D-Ring couplers, and if you buy from that link, you'll make me some pennies towards my own layout...

Friday, 16 September 2011

Adding Symoba NEM Pockets & Kadee Couplings to Hornby Railroad Class 06

Following on from my experiment to convert the Hornby Railroad Class 06 to DCC, I'd been happily running it around an oval layout at a highly non-prototypical (or is that protoatypical?) speed when I realised that to actually do shunting with my Bachmann and Piko wagons in any kind of meaningful way, it would need further modification.

Since reading Model Rail's NEM coupler test report, I've gone a bit Kadee mad, fitting them to almost everything in sight. Okay, due to limited funds, I do generally just fit them to one example of each wagon, but that's an easy process, and easy to reverse.

Which brings me to the Railroad Class 06, which, unlike my more expensive HO Piko loco, doesn't have NEM pockets. For the uninitiated, NEM pockets are little boxes that hold the coupling, and which make it easy to interchange couplings as you wish.

The Class 06, however, has a Lima style D ring. Luckily, it's in plastic.


Clearly, if I was going to Kadee-ify the Class 06, I'd first have to get rid of the Lima D rings (oh, yes, front and back) and replace them with something capable of taking the Kadees.


(For those wondering, I use Kadee rather than the clever Brian Kirby 'BK' magnetic uncoupling solution on my inglenook-inspired shunting layout because I take advantage of the delayed uncoupling feature. More on that another time.)


It turns out that Symoba made the exact pieces that I needed : a NEM pocket and adapter to hold it. The NEM socket was cheap. The adapter, because of the little springs inside it to handle cornering, and the engineering of the whole thing was not quite so cheap!


At this point, a photo would be useful, but again, I didn't take any, so you'll have to take a look at the official Symoba web site. When I do another hatchet-job on a Railroad, I'll post up the photos. Promise.


Back to the conversion. Take a knife, and remove the D-rings. Prise out the little bobbing arm thingy, and take a deep breath.


At this point, I thought it would be an easy enough job : just cut enough of the chassis away to accommodate the mounting plate for the adapter, and glue it in place, plastic to plastic.


Wrong!


In fact, you have to cut the chassis right back to the metal underside, otherwise you can't get the NEM pocket high enough up the sprung mounting pole to meet the height of the other couplings on the rolling stock. 

I tried every which way, swore, sweated, and then un-glued the mounting plate to give it another go. Cutting back to the metal does the job, on the Class 06, but I can't vouch for other locos. Either way, the sprung pole is long enough that it doesn't really matter how far into the chassis area the adapter is mounted.


And that's it. I got a piece of rail, put a NEM/Kadee-ified wagon on it, and used that to measure the height of the pocket, which slides onto the mounting pole. That's a tight fit, so be sure to only push it up the pole gradually, as going the other way might just tear the mounting plate away from the chassis of the loco.

Now, the running tally of the cost of the Class 06 is as follows:
  • Loco : £20
  • DCC chip : £11
  • NEM pockets : £1
  • NEM adapters : £6
  • Total : £38

The closest thing to that would be Bachmann's admittedly excellent Class 03 (or Class 08's) which are around £50-54, and would need a DCC chip fitting, for a total of, at most £65. They are better runners, allegedly, but I'll find that out when I get myself one at the Folkestone MRC2011 Exhibition in October.

Tuesday, 9 August 2011

Aha! DCC Conversion for the Hornby Railroad 06 Class Diesel

Recently, those fine folks at Hornby released a Railroad edition of the Class 06 Diesel Shunter for an extremely affordable £20. Now, even a newbie like myself understands that there's a certain disdain reserved, by some people, for the Railroad editions, but when you're just starting out, with limited funds, Metcalfe models, and Railroad stock are just sensible, value for money, options.

Being a Railroad, of course, it's missing DCC, and the DCC plug, has no lights, and being Hornby isn't compatible with my existing Kadee couplers. So, I've got three projects on the go, one of which is now complete - my non-DCC Class 06 Diesel now has a Hornby 4 function DCC chip installed.

For those keeping score - that's £31 spent so far, plus about 45 minutes of work (bracketed by an hours worth of head-scratching.) Before I explain the project, I'd also like to point out that I wouldn't have even bothered, were it not for the free DCC guide that came with August's Model Rail magazine. I'd have just bought an expensive, DCC shunter, and not bothered with the Engine Shed, Goods Shed, track, points, etc. etc. that I was able to buy with the difference...

I should also mention that I have two regrets : I didn't take photos, and I don't have a soldering iron. So, this is a solder-free, no photo project. If you're going to attempt it, I recommend both taking photos, and using solder!

Step 1 : dismantle the loco following the instructions that came with it. If you're reading this in 2015, and bought it second hand at a local fair, then look underneath, there are little clips that can be persuaded to release the body from the frame in two parts.

Step 2 : cut the wires that lead from somewhere udner the motor (from the rail pickups), to the motor itself. Now, I know that there are people out there who will strip it right back, take off the motor, de-solder the TV supression (two capacitors) etc.etc., but I just cut the black wires, folded them back, stripped about 5mm of insulation off,and twisted the ends.

Step 3 : cut the plug off the DCC chip. You don't need it, since there's no DCC socket. But, leave as much wire as you can, as it makes the next bit easier.

Step 4 : put the loco down in front of you, with the front facing. This is important, because, unless you want to reverse the function of forwards and backwards, you have to get the right wire on the right side of the motor.

Step 5 : identify the right and left motor wires from the DCC pin allocations given in the DCC instructions. In my case, it was grey (left) and orange (right).

Step 6 : do the same for the power connections (rails). In my case, these were red (left rail) and black (right rail).

Step 7 : solder the correct colored wires to the correct black wire ends created by the cutting process in step 2. In my case, I twisted them together, and insulated with tape. Following Hornby's own directions, I also taped the wires around the DCC chip, but you might like to leave that until after testing and programming the DCC decoder. So...

Step 8 : test and program the decoder on your programming rail, or on the main.

Step 9 : if it didn't work as planned, check the wiring. If it did, put everything back how you found it, with the addition of the DCC decoder sitting on top of the motor - there's space!

And that's about all there is to it. No doubt I made mistakes, and no doubt others can do it better, but for a newbie, I thought I'd done okay! Next time, photos, I promise...

The next Railroad Class 06 Diesel project is to get rid of those irritating toy-like couplers and put on nice, shiny, but somehow out of place Kadees instead. After all, they did win the Model Rail magazine August edition's Coupling Test (for best auto couplers.)

Other railway modeling magazines are available.