Monday 30 July 2018

How to Make a Wall-Mounted Train Display Case from a Wooden Wine Box

This project was borne out of the necessity to 'do something' with some bits of old track and a wooden wine box. I'd held on to both of these for as long as the wife was willing to stand: they were lying around in the garage and she kept threatening to throw them out!

I was looking for a way to store rolling stock so that it was protected, out of the way, but easy to access when operations required.

The idea of a wall mounted display box appealed, so I set to it one Saturday morning.

The Wooden Wine Box

Somebody had given me some wine (3 bottles) that happened to come in a box with separators. I think it was because there was a red, white and rosé, or perhaps two reds and a white.

The important point about this is that there are two drilled slits in the wooden sides, which contain the separators.

This makes them easy to slip out and, say, stick some model railway tracks on them.

Having tried a number of configurations, using some old Hornby track that I bought at a model rail show -- and had clearly been part of a house clearance -- it quickly became clear that trying to hot-glue them to the wood wasn't a great idea.

By a similar token, trial and error led me to the following bits of advice...

Placing Rails

Although it's tempting, don't try to place the rail as close as possible to the back of the box, in the hope that you'll get twice as much track in. It's obvious when you think about it, but most rolling stock is wider than the OO standard sleeper width.

This overhang caused me to curse and then try to remove the tracks from the wood (I'd glued them down) because the coal trucks I'd chosen to display were too wide, and wouldn't sit on the rails properly.

I'd also chosen to hot glue the tracks down. Not a mistake I'll ever make again: it's impossible to rip up without damage.

On top of which, if you double the track, not only do the trains / trucks rub up against each other, there also isn't quite enough space to reliably remove stock from the back, so you end up removing the front items as well!

It turns out, however, that placing the rails in the middle, and making sure that there's space at either end to slide it into the box, makes for a neat plinth-like presentation.

Being removable, if you put buffers (or just a retaining screw) at each end, you can also slide them out (except the bottom one) to swap stock around.

Wall Mounted

The final step was to drill a couple of holes in the box: I didn't measure, which I regret for two reasons:

  • It doesn't look symmetrical;
  • I didn't leave enough space in the corners to drill through and mark the wall, and there wasn't enough space to use the electric screwdriver to mount the box.
The moral of the story is: if you're going to drill from the back, measure, and make sure there's space when you need to screw it to the wall to get the drill / screwdriver in the corner.

Still, I'm pleased with the result, and I'll add a photo of the installed case, complete with all my coal trucks in it as soon as it's up.

Meanwhile, I'm thinking about putting some low-voltage LED strip-lighting along the understanding of the shelves to light the wagons up, but before I do that I figure a lick of paint wouldn't go amiss.

But, it's a case of having enough time to 'get around to it'.

My next weekend project is to build a test track / workbench with space to mount my Hornby Elite so that there's also space for a computer to help with automated layout control and DCC programming. Fun times... 

Comments as always welcome, and if you're looking for somewhere to get wine boxes, I've linked to a Gumtree search in the Resources section below.

Resources:


Monday 21 May 2018

How to Paint Lines on Model Tarmac Roads

Basic flat tarmac roads are easy to model for beginners: I just use cheap black fine grain sandpaper. It comes on a roll and is cheap and easy to cut to size.

Here's a tip, though, only mark and cut it from the back. The grainy side, after all, has been designed to smooth rough wood, and tends to do the same on pencil lead and even cutter blades (blunting them both in the process!)

Measuring Up

Depending on how prototypical you want to be, and how much space you have, there are two ways to go about making a tarmac road: measure and scale down, or place and guess. You may even start out by measuring, and then find that there just isn't the space to do what you wanted to do!

For example, for my street scene, I went out into the road to measure the width of the lines, as well as the width of the road, only to find that on a layout measuring 40cm in depth, there wasn't enough space. So, I placed two cars side by side, and that became the lane widths.

Painting Lines on Model Roads

The basic theory is easy enough:
  1. Calculate the distance from the pavement;
  2. Calculate the line width;
  3. Mark up the area to be painted with decorators tape;
  4. Paint.
The resulting road should look something like the picture on the right.
Marked Up Tarmac Road

The overlap isn't intended to be the centre line: the road isn't wide enough for that, and so won't be entirely prototypical. However, as mentioned above, due to space restrictions, 'good enough' will have to do! 

The next stage is to choose your paint colour. I use Humbrol 81: Pale Yellow. This looks correct for UK yellow lines.

For white lines (parking spaces, for example), I use a basic matt white paint.

It's important to dry brush the paint onto the sandpaper. Because of the fine grained nature, you will almost never be able to get the decorator's tape to form a perfect seal. If you try, by smoothing it down, you will also usually scrape your finger along the sandpaper at the same time, leaving an unsightly trace.

Failed Yellow Lines
The result of straight painting can be seen on the left.

Paint has bled over the edges, leaving unsightly splodges. So; unless the tape can provide a perfect seal, it is going to be impossible to get that "just painted" look.

Dry brushing the lines has two advantages: firstly, you don't get the bleeding underneath the tape, and secondly, it looks like a realistically aged line, rather than a fresh one.

The technique I use is to load up the brush, and then paint it onto the tape, as if using it as a mixing palette. Once there's no more paint on the brush, I then stipple the paint from the 'palette' onto the sandpaper.

Painted Yellow Lines!
(This doesn't do the brush any good, by the way, but for these tasks, I use cheap bulk-buy packs from a local DIY store.)

The mess that this makes can be seen on the right.

It's also quite wasteful in paint; I'm fairly sure there's a better way (I've toyed with the idea of using a sponge rather than a brush), so feel free to comment below if you have advice from your own painting experiments.

However, I'm quite impressed with the results that I get. Here's the finished product:

Finished Yellow Lines
I've zoomed the photo a bit to show the texture of the sandpaper, as well as the slight blotching of the lines that give them that lived-in look. Whether this would work as well in N or O gauge, I don't know, but for OO/HO it seems to be accurate.

Just for completeness, here's the road placed on the layout:


The image on the left shows the original road, with the one on the right showing the new extension, painted in the step-by-step process above. If things look a little dicey (one of the lamp-posts is a touch slanted) then that's because nothing is stuck down yet!

Sunday 10 December 2017

How to Clean Your Layout: Track Cleaning Alternatives from Hornby, Dapol and Gaugemaster

Keeping a layout clean (at least the important bit - the tracks) is a bugbear for many active model rail enthusiasts. For those of us that either have our layouts in dusty environments (attic and garage) or travel with them, dirt and grime is a constant worry.

|When it builds up on the tracks, it can prevent proper electrical connection.

Although it is less noticeable for high speed trains that run around in a big loop, many of us are also downsizing to smaller layouts due to lack of space. This leads to lower speed shunting layouts with Class 08s crawling at low speeds and over pointwork which can be very susceptible to dirt.

Track Cleaning Alternatives

Here's a brief overview of (almost) all the options, plus links to examples:

  • Hornby track cleaning coach - small yellow coach, a bit garish but functional, with old-style D couplings;
  • Gaugemaster track cleaning pads - pads that hang below the axle of any coach/truck, but do not scrape or press down at all, so only really good when used in conjunction with a high frequency electronic track cleaner (see below);
  • Dapol track cleaner - motorised track cleaning locomotive: expensive but effective, pair up with Dapol rack cleaning fluid;
  • Track rubber - simple, effective, and quite time consuming (also, you need to be able to reach all corners of the layout);
  • Electronic track cleaner (Gaugemaster) - always-on, detects instants when connectivity is broken, and uses a high frequency current to burn off any dirt before it can build up;
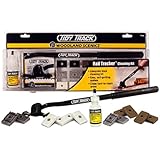
  • Track cleaning kit (Woodland Scenics, pictured) - contains everything needed to thoroughly clean your track, including a telescopic arm on which you can mount the cleaning pad to reach the most distant corners of your layout. 
Essentially, there are three different approaches to cleaning track, one of which (the electronic cleaner) is more about prevention than cure.

Of the other two, there is a difference between the more abrasive approach of the Dapol, Hornby and track rubber solutions which rely on scraping to remove dirt, and the pad approach, which is gentler.

Cleaning solutions that use scraping need two things -- downwards pressure on the track, and movement, usually powered.

The Hornby cleaning coach needs to be pushed around by a locomotive (and comes in at around £30), whereas the Dapol track cleaning unit is self-powered, but also over twice the price (expect to pay around £70).

Everything else requires good, old-fashioned, elbow grease.

Tips for Better Results when Cleaning Track


There are a number of reasons why keeping track clean is a good idea. Besides the obvious -- dropping power and stopping -- any dirt that is present on the tracks will be picked up by locos and can get deposited on the pickups causing a longer-term issue.

So, the first key to keeping tracks clean might appear counter intuitive -- keep the loco wheels clean!

It is also important to avoid over-oiling the tracks as this will affect running and pulling power, is it may cause the wheels to slip. However, light oiling can help protect the tracks and prevent dirt build-up, so some model rail enthusiasts swear by it, usually using a citrus based product.

Finally, for the best wipe-off cleaning results, an alcohol based fluid or cleansing wipe, or good old lighter fluid (but be warned, it's highly flammable!) is a good option.

However, as I point out in my Hornby Track Cleaning Coach article, a dedicated track cleaning truck, or coach, cannot be beaten.

Friday 8 December 2017

The Next Generation of Onboard Video Cameras for Model Rail

It's been around 4 years since I originally wrote my "Best Video Camera for Model Rail" post. It remains one of the most popular, and generates a lot of questions.

Many of those revolve around how to put the micro video camera inside rolling stock, for aesthetic reasons.

My original solution was to use an 808 style key fob camera, which I later upgraded to a USB stick look-alike. However, I didn't quite have the guts to pull these apart and put them in a wagon.


First off, there's the Aobo Wifi Camera, which, according to the reviews is a clear favourite among modellers.

It's been fitted to model aircraft and cars with success; one of the strong points appears to be the battery life, while another is the dual WiFi control and SD card slot.

This allows the user to both start and stop recording, get a live view, and record to the built-in SD card slot (the card is an optional extra).

There are two versions of the Aobo -- 640 and 1080 -- at two price points. It's probably worth paying the extra to get the updated HD version, but those on a budget will be glad to see that the 640p version is coming down in price as more recent versions hit the market.

What I like is that the camera is on a ribbon, which means that you can put the camera wherever you like, and not be constrained by the shape of the camera housing.


For even more flexibility, and at a slightly cheaper price point, is the Magendara 1080p Micro Video Camera.

It may not feature WiFi control, but it does come with a wireless controller, records to SD card (up to 32Gb, but not included) and has a 10 hour battery life.

Again, the camera is on a ribbon, which makes for easy installation in rolling stock, and the body (battery included) is even more compact, as it doesn't have any kind of casing, just a heat-wrap.

However, reviewers report that this camera is quite delicate, so handle with care. Otherwise, results are seemingly on a par with the Aobo.

Moving down again through the price points, Flylinktech have a number of miniature video cameras, hidden in everything from a door mounted clothes hook, to watches and fake (eye) glasses.


While these are about half the price of the Aobo and Magendara cameras, fitting them to rolling stock will, like the 808 Key Chain Camera, take some modification.

Easiest to modify would appear to be the hook -- there are a couple of screws in the back which, looking at the photos, ought to allow for easy removal.

Otherwise, you could cut the arm of the glasses off, and use it as-is, or work out a way to get at the electronics.

One final miniature video camera category to explore might also be the latest FPV cameras designed for use with micro drones. The come with the FPV camera, but need various wireless transmitters and receivers.

They have a kit-building feel to them, and a suitable list can be found by following this link.

For my money, I think the Magendara 1080p Micro Video Camera might represent the best value, so, as soon as I get an opportunity, I'm going to give it a whirl!

Model Rail Christmas Gifts: Hornby Track Cleaning Coach

The Hornby Track Cleaning Coach (R296) popped up on Hornby's annual Top 10 Model Rail Christmas Gift list. It rolled (pun intended) into 10th place, but to my mind should have been higher.

Reading the reviews, there are a few negatives to go with the largely positive opinion of this tidy inexpensive solution to the perennial problem of dirty tracks.

This analysis of the R296 is based on a mixture of these reviews and personal experience. My own layouts are in a loft space and the garage -- both pretty dusty and prone to picking up dirt -- as well as the seasonal Christmas train around the tree in the sitting room.

This last is perhaps the worst, but due to fluff and not dirt: the tracks are pretty clean!

How Does the Hornby Track Cleaning Coach Work?


The point of a track cleaning coach is that it has to be abrasive to work. It scrapes the dirt off the tracks; replacing the need to go round with a track rubber.

A track rubber is an excellent low-cost solution if you can reach all the corners of your layout. In the garage layout, which is on wheels, I can. In the loft, where the layout is built into a corner, that's not the case.

Enter the track cleaning coach: two strips of wet and dry paper, held in spring-loaded clamps that force themselves onto the rails, pushed around by a suitable locomotive.

Most layouts that aren't actually grimy can be cleaned with a single trip around the loop. Obviously, dirtier tracks will need more attention, and for some only adding some form of cleaning fluid will have the desired effect.

So, for a lightly dirty track, this is the perfect solution. Points (a.k.a. turnouts or switches) don't unsettle it, but use with care, and consider cleaning them separately. They shouldn't usually be in inaccessible places on the layout anyway, for several reasons:
  • if they're powered, they can go wrong;
  • if they're manual, you need to switch them;
  • if they're wire-in-tube, then they can suffer mechanical faults.
One point that most reviewers agree on is that you should also buy replacement strips at the same time because you don't get many in the box, and they will wear out.

Alternatives to the Hornby Track Cleaning Coach

I'm going to do a feature on this before Christmas, but 

For ease of use, realistic price, and as a great Christmas gift for any model rail enthusiast, I'd go for the Hornby R296 Track Cleaning Coach.